null

The Ultimate Guide To Nail Bonders: The Secret To Long-Lasting Gel Manicures

Gel nail polish has revolutionized the nail industry, offering long-lasting and glossy finishes that remain chip-free for weeks. However, the secret to a perfect gel manicure isn’t just the polish itself; it’s the crucial component known as the “bonder.” In this guide, we explore the world of bonders, from their chemistry to their vital role in the gel nail manicure process.

what is bonder gel for nails

What Is Bonder For Gel Nails?

A gel bonder is a specifically formulated gel-based solution designed for direct application to natural nails. By interacting with the keratin inherent in your nails, it establishes a robust bond between the natural nail and the gel polish. Often referred to as a bonding agent, the bonder not only ensures that the gel polish adheres securely but also intensifies this bond. This minimizes the chances of the polish lifting, chipping, or peeling, ensuring a longer-lasting manicure.

Critical Functions of a Bonder :

  • Prevents Lifting: Bonders form a barrier against the natural oils and moisture on the nail plate, ensuring the gel polish doesn’t lift.
  • Improves Adhesion: They enhance the bond between the gel polish and the nail, ensuring the polish remains intact for a longer time.
  • Prevents Chipping: By reinforcing this bond, bonders minimize the chances of polish chipping, promising a salon-quality finish for weeks.

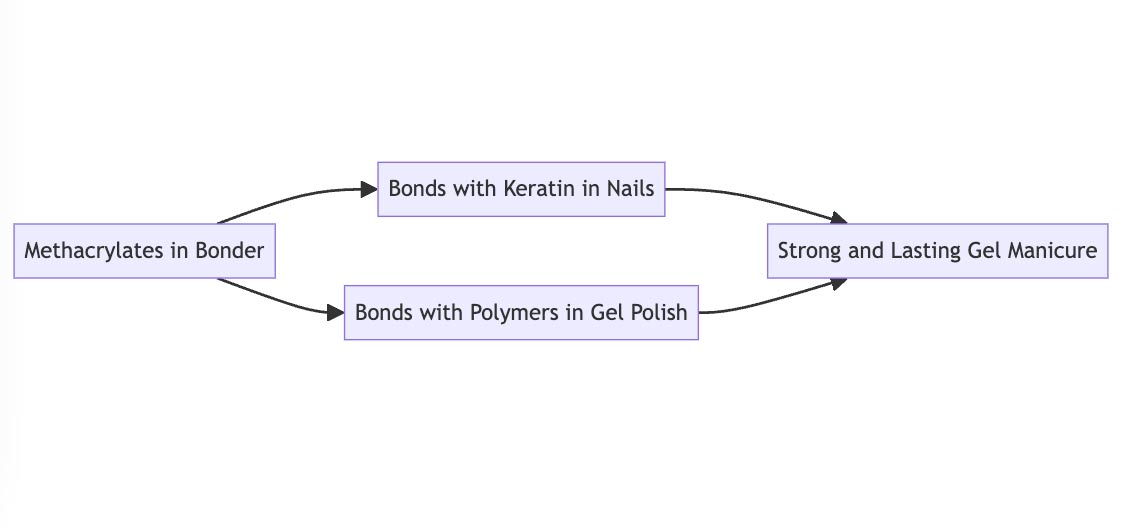
The Science Behind Bonders Bonders for gel nails often incorporate chemical compounds known as methacrylates. These compounds bond uniquely with the keratin in our nails and the polymers in the gel polish, guaranteeing a robust connection.

how gel bonder works

Different Types Of Bonders For Gel Nails

There are both UV and non-UV bonders in the manicure industry. They’re designed to work with different types of nail systems, and each has its benefits and uses. Here’s a brief overview:

UV Bonder:

  • Purpose: UV bonders are used primarily with UV gel systems.
  • How It Works: These bonders are formulated to enhance the adhesion of UV gel products to the natural nail. After applying the UV bonder, place the fingernails under a UV (or LED) lamp to cure or harden the product.
  • Benefits: UV bonders, when used in conjunction with UV gel systems, can provide a long-lasting, chip-resistant manicure that can last for weeks.

Non-UV Bonder:

  • Purpose: Non-UV bonders are commonly used with traditional acrylic fake systems, gel systems and sometimes with regular polish to improve adhesion.
  • How It Works: These bonders work without the need for UV light. They often function by chemically preparing the nail plate to bond more effectively with acrylics or polish.
  • Benefits: Non-UV bonders can enhance the durability of traditional manicures and are suitable for those who don’t want to use UV or LED lamps.

 Primer/Bonders:

  • Purpose: These dual-action products combine the properties of both primers and bonders, streamlining the nail preparation process.
  • How It Works: Primer/bonders balance the pH while also creating an ideal surface for nail enhancements to bond to. Depending on the specific product, it might require curing under a UV or LED lamp.
  • Benefits: Simplifies the nail prep process by combining two steps into one, potentially saving time and ensuring strong adhesion.

The goal, regardless of the type of bonder you choose, is to boost the bond between products (gel or acrylic) and the natural fingernails. This ensures a longer-lasting manicure that resists lifting or chipping. Always ensure that you’re using the correct bonder for the system at hand to attain optimal results.

How To Use And When To Apply 

By incorporating the bonder for gel nails correctly into your gel manicure routine, you pave the way for a longer-lasting, more resilient finish. Whether you’re a professional technician or a DIY enthusiast, understanding the importance and method of bonder application step by step can take your gel manicures to the next level.

  1. Prepare the Nail:
    • Clean the Nails: Start with clean, dry nails. Remove any existing nail polish or product.
    • Cuticle Care: Push back the cuticles gently and remove any non-living tissue from the nail plate.
    • Buff the Nail Surface: Gently buff the nail’s surface to remove shine, ensuring an even surface for better adhesion.
  2. Clean the FingerNail:
    • Using an alcohol-based cleanser or a nail prep solution, thoroughly wipe down the nail to remove any oils or residues.
  3. Apply the Bonder:
    • Brush on a thin, even layer of the bonder over the entire nail, carefully avoiding the skin and cuticle area.
  4. Cure Under a UV/LED Lamp (If required):
    • Depending on the specific bonder’s instructions, you may need to cure the bonder under a UV or LED lamp. Typically, this is for 1-2 minutes under a UV lamp or 30 seconds under an LED light.
  5. Proceed with the Gel Application:
    • With the bonder in place and cured if necessary, you can apply your gel base coat, color coat, and finally, the top coat, curing each layer as required.

Post-Application Tips To Maximize Longevity:

  • Avoid Water for the First Few Hours: Steer clear of water for 2-3 hours after your manicure. This precaution allows the manicure ample time to set firmly.
  • Regularly Use Cuticle Oil: Regular nourishment of the cuticles ensures the surrounding skin remains hydrated, decreasing the risk of any nail edge lift.
  • Wear gloves when dealing with household chores or cleaning agents to keep potential solvents from weakening the manicure’s bond.

FAQ

Conclusion

Achieving the perfect gel manicure is a blend of art and science. While the stunning colors and finishes of gel polish get all the attention, behind-the-scenes players like Bonders are indispensable. By understanding bonders— their role, chemistry, and best application practices— you can elevate your game to achieve salon-quality results consistently, whether you’re a nail pro or a DIY enthusiast.

What is Bonder For Gel Nails?

Newsletter

Don't Miss Out