

- Product
- Qty in Cart
- Quantity
- Price
- Subtotal
-

Amber Glow Flakes - Rubber Base
$12.85Illuminate your nails with Amber Glow, a delicate yet luxurious Rubber Base Gel featuring a soft translucent nude base infused with shimmering golden flakes. This shade captures the elegance of natural amber stone, offering a sophisticated sparkle that... -


Scarlet Orange - Rubber Base
$12.85Make a statement with Scarlet Orange, a radiant reddish-orange Rubber Base Gel that delivers both strength and style. This bold shade brings fiery intensity to your nails while offering the flexibility and durability of a professional rubber base formula... -


Dune Bliss – Natural Rubber Base Gel
$12.85Neutral beige rubber base for minimal, polished nails. Self-leveling and soak-off. Dune Bliss (140) brings a calm beige that suits any style. Use it as a base for French, a clean overlay, or pair it with earthy tones. The self-leveling base gives an... -


Petal Whisper – Soft Pink Rubber Base Gel
$12.85Soft petal-pink rubber base for a fresh, natural look. Self-leveling and soak-off. Petal Whisper (139) gives nails a clean pink glow that suits daily wear or bridal-style sets. The self-leveling base creates a smooth surface for overlays, French bases,... -


Lilac Haze – Rubber Base Gel
$12.85Dreamy pastel-lilac rubber base for soft, feminine nails. Self-leveling and soak-off. Lilac Haze (138) delivers a subtle pastel lilac with a clean glossy finish. Easy to apply thanks to the self-leveling base, it works well for floral accents, spring... -


Caramel Drift – Rubber Base Gel
$12.85Warm caramel-nude rubber base that pairs well with gold and earthy tones. Self-leveling and soak-off. Caramel Drift (137) brings a warm caramel nude that looks good year-round. The self-leveling base creates a smooth surface for overlays or as a... -


Misty Cashmere – Gray Rubber Base Gel
$12.85A soft gray rubber base with warm undertones, Misty Cashmere is ideal for chic, understated manicures. Misty Cashmere (136) is a refined shade from the Pastel Nudes Essentials Collection. This soft gray with a touch of warmth captures the elegance of... -


Pastel Nudes Essentials Rubber Base Collection – 5 Soft & Elegant Shades
$52.93The Pastel Nudes Essentials Rubber Base Collection is crafted for those who love chic, natural, and versatile nails. Featuring five modern pastel nude shades, this set is perfect for everyday wear as well as special occasions. Formulated with Dan’s... -


Cosmo Dots Rubber Base Gel Nail Polish
$13.97Introducing Dan’s Nails – Cosmo Dots Rubber Base Gel Polish, a milky rubber base infused with bold black and blue glitter flakes that recreate a modern terrazzo effect. This one-of-a-kind design shade is ideal for nail techs and clients... -
Sale

 Sale
SaleBlack Onyx Rubber Base Gel Color
$15.97$11.96Product Specification: Volume: 15ml/0.5 fl. oz Color: Black Onyx Package Includes: 1 Bottle Required UV/LED Nail Dryer Lamp and gel topcoat must be used (NOT INCLUDED) Black Onyx Rubber Base Gel Nail Polish Color A... -
Sale

 Sale
SaleCrystal Diamonds Trio Rubber Base Gel Collection
$53.91$35.79Introducing Dan's Nails Crystal Diamonds Trio Rubber Base Gel Collection. Revel in the splendor of three resplendent gel nail polishes, each capturing the shimmer and sparkle of the world's most coveted gems. This collection includes: Crystal Lagoon... -
Sale

 Sale
SaleStarlight White Rubber Base Gel Coat | Milky Color with Glitters
$19.97$11.97Introducing Dan's Nails - Ethereal Starlight White Rubber Base Gel Nail Polish, a plush blend emanating a milky shimmer. This tailored remedy for delicate nails boasts a self-leveling feature, and its precision-crafted formula ensures an unyielding... -
Sale

 Sale
SaleCrystal Lagoon Glow Rubber Base Gel | Teal Iridescent Glitter
$19.97$11.97Dan's Nails - Crystal Lagoon Glow Rubber Base Gel Nail Polish is a luxurious polymer blend radiating an iridescent glow. This ideal solution for fragile nails is self-leveling and meticulously designed to secure a reliable bond between the natural nail... -
Sale

 Sale
SaleCelestial Haze Rubber Base Gel | Light Blue & Light Purple Blend with Glitters
$19.97$11.97Volume: 15ml/0.5 fl. oz Color: Celestial Haze Package Includes: 1 Bottle Required UV/LED Nail Dryer Lamp and gel topcoat must be used (NOT INCLUDED)Color: Celestial Haze | Ethereal Light Blue & Gentle Purple Blend with Shimmering... -
Sale

 Sale
SaleCocoa Bean Rubber Base Gel Nail Polish | Dark Red Burgundy Color
$15.97$10.97Product Specification: Volume: 15ml/0.5 fl. oz Color: Cocoa Bean | Dark Red Burgundy Package Includes: 1 Bottle Required UV/LED Nail Dryer Lamp and gel topcoat must be used (NOT INCLUDED) Cocoa Bean Rubber Base Gel Nail Polish | Dark Red Burgundy... -
Sale

 Sale
SaleLava Smoke Rubber Base Gel Nail Polish Coat | Dark Grey Color
$15.97$10.97Product Specification: Volume: 15ml/0.5 fl. oz Color: Lava Smoke | Dark Grey Package Includes: 1 Bottle Required UV/LED Nail Dryer Lamp and gel topcoat must be used (NOT INCLUDED) Lava Smoke Rubber Base Gel Nail Polish Coat | Dark Grey Color: A... -
Sale

 Sale
SaleRoyal Blue Rubber Base Gel Polish Coat Color
$15.97$10.97Product Specification: Volume: 15ml/0.5 fl. oz Color: Royal Blue Package Includes: 1 Bottle Required UV/LED Nail Dryer Lamp and gel topcoat must be used (NOT INCLUDED) Royal Blue Rubber Base Gel Nail Polish Color: A transformative solution for thin... -
Sale

 Sale
SaleIguana Green Rubber Base Gel Nail Polish Coat
$15.97$10.97Product Specification: Volume: 15ml/0.5 fl. oz Color: Iguana Green Package Includes: 1 Bottle Required UV/LED Nail Dryer Lamp and gel topcoat must be used (NOT INCLUDED) Iguana Green Rubber Base Gel Nail Polish Color A transformative solution for thin... -
Sale

 Sale
SaleGolden Latte Rubber Base Gel Coat Nail Polish | Light Brown Color Lac Soak off UV/LED
$16.97$11.97Product Specification:Volume: 15ml/0.5 fl.ozColor: Golden Latte Light BrownPackage include: 1 Bottle Required UV/LED Nail Dryer Lamp, must be used with a gel topcoat. (NOT INCLUDED) Golden Latte Light Brown Rubber Base Gel Polish... -
Sale

 Sale
SaleSunset Orange Rubber Base Coat Gel Nail Polish | Burnt Dark Hue
$16.97$10.97Product Specification:Volume: 15ml/0.5 fl.ozColor: Orange BurntPackage include: 1 Bottle Required UV/LED Nail Dryer Lamp, must be used with a gel topcoat. (NOT INCLUDED) Orange Burnt Rubber Base Gel Polish Coat a... -
Sale

 Sale
SaleChilli Red Rubber Base Gel Coat
$16.95$10.97Product Specification:Volume: 15ml/0.5 fl.ozColor: Chilli Red Package include: 1 Bottle Required UV/LED Nail Dryer Lamp, must be used with a gel topcoat. (NOT INCLUDED) Chilli Red Rubber Base Gel Polish Coat a game-changer... -
Sale

 Sale
SaleBallet Pink Glitter Gold Flakes Rubber Base Gel
$13.89$11.97Product Specification:Volume: 15ml/0.5 fl.ozColor: Ballet Pink Glitter Gold FlakesPackage include: 1 BottleRequired UV/LED Nail Dryer Lamp, must be used with a gel topcoat. (NOT INCLUDED) Ballet Pink Glitter Gold Flakes Rubber Base... -
Sale

 Sale
SaleLavender Flakes Rubber Base Gel Coat
$17.95$11.97Product Specification: Volume: 15ml/0.5 fl.ozColor: Lavander FlakesPackage include: 1 BottleRequired UV/LED Nail Dryer Lamp, must be used with a gel topcoat. (NOT INCLUDE) Lavender Rubber Base Gel Polish Coat a... -
Sale

 Sale
SaleMocha Flakes Rubber Base Gel Coat
$17.95$11.97Product Specification:Volume: 15ml/0.5 fl.ozColor: Moca Flakes Package include: 1 BottleRequired UV/LED Nail Dryer Lamp, must be used with a gel topcoat. (NOT INCLUDE) Moca Flakes Rubber Base Gel Polish... -
Sale

 Sale
SaleMilky Flakes Rubber Base Gel Coat
$15.97$11.97Product Specification:Volume: 15ml/0.5 fl.ozColor: Milky FlakesPackage include: 1 BottleRequired UV/LED Nail Dryer Lamp, must be used with a gel topcoat. (NOT INCLUDE) Milky Rubber Base Gel Polish Coat a... -


Magic Flakes Rubber Base Collection
$47.91Gel Rubber Base Gel Polish Coat a game-changer for thin and weak nails. PROFESSIONAL USE: Rubber Base Gel is a UV light curing polymer system for high performance and long-lasting high gloss anti-scratch, solvent, and weathering... -

")
Rubber Base Gel Polish Coat (Blink Fest Collection)
$63.97Celebrate color, texture, and creativity with the Blink Fest Collection – a curated line of Rubber Base Gel Polishes by Dan’s Nails, designed to bring dimension and fun to your nail sets without sacrificing performance. Each shade in the... -
Sale

 Sale
SaleMagic Hour Collection | Rubber Base Gel
$71.88$51.97Volume: 4 Bottles, 15ml/0.5 fl. oz each Colors: Pixie Pink, Goldfish, Silvered White, Glint Green Package Includes: 4 Bottles Required: UV/LED Nail Dryer Lamp and gel topcoat (NOT INCLUDED) Magic Hour Collection | Rubber Base Gel A transformative... -
Sale

 Sale
SaleTropical Temptations Rubber Base Gel Collection
$74.85$49.36Unveiling Dan's Nails "Tropical Temptations" Rubber Base Collection - a game-changing solution for your nail needs! Our innovative formula is designed to deeply strengthen and fortify your nails, providing the support they need to grow long and healthy... -
Sale

 Sale
SaleNude Rubber Base Gel Coat Collection
$67.36$49.36Nude Gel Rubber Base Gel Polish Coat a game-changer for thin and weak nails. PROFESSIONAL USE: Our Nude Rubber Base Gel is a UV light curing polymer system for high performance and long-lasting high gloss anti-scratch, solvent, and weathering... -
Sale

 Sale
SaleGlint Green Rubber Base Gel
$19.97$13.97Volume: 15ml/0.5 fl. oz Color: Glint Green Package Includes: 1 Bottle Required: UV/LED Nail Dryer Lamp and gel topcoat (NOT INCLUDED) Glint Green | Rubber Base Gel A transformative solution for thin and weak nails. FOR PROFESSIONAL USE: Introducing the... -
Sale

 Sale
SaleClear Rubber Base Gel Coat
$14.97$10.97Product Specification:Volume: 15ml/0.5 fl.ozColor: Transparent, ClearPackage include: 1 BottleRequired UV/LED Nail Dryer Lamp, must be used with a gel topcoat. (NOT INCLUDE) Clear Rubber Base Gel Polish Coat a game-changer for thin and weak nails... -


Frosty Revel Rubber Base Gel Nail Polish
$13.97Introducing Dan’s Nails – Frosty Revel Rubber Base Gel Polish, a semi-sheer white base filled with icy iridescent flakes that reflect hints of silver, lilac, and ocean blue. This elegant and festive rubber base evokes the feeling of a winter... -
Sale

 Sale
SalePixie Pink Rubber Base Gel
$19.97$13.97Volume: 15ml/0.5 fl. oz Color: Pixie Pink Package Includes: 1 Bottle Required: UV/LED Nail Dryer Lamp and gel topcoat (NOT INCLUDED) Pixie Pink | Rubber Base Gel A transformative solution for thin and weak nails. FOR PROFESSIONAL USE: Introducing the... -
Sale

 Sale
SaleRose Rubber Base Gel Coat
$14.97$10.97Product Specification:Volume: 15ml/0.5 fl.ozColor: RosePackage include: 1 BottleRequired UV/LED Nail Dryer Lamp, must be used with a gel topcoat. (NOT INCLUDE) Rose Rubber Base Gel Polish Coat a game-changer for thin and weak nails. PROFESSIONAL... -
Sale

 Sale
SaleGoldfish Rubber Base Gel - Peachy-Pink with Gold Flecks
$19.97$13.97Volume: 15ml/0.5 fl. oz Color: Goldfish (Peachy-pink with subtle gold flecks) Package Includes: 1 Bottle Required: UV/LED Nail Dryer Lamp and gel topcoat (NOT INCLUDED) Goldfish | Rubber Base Gel A transformative solution for thin and weak nails. FOR... -
Sale

 Sale
SaleCoral Bead Rubber Base Gel Coat
$16.99$14.86Product Specification:Volume: 15ml/0.5 fl.ozColor: Coral BeadPackage include: 1 BottleRequired UV/LED Nail Dryer Lamp, must be used with a gel topcoat. (NOT INCLUDE) Coral Bead Rubber Base Gel Polish Coat a game-changer for thin and weak... -


Party Speck Rubber Base Gel
$13.97Introducing Dan’s Nails – Party Speck Rubber Base Gel Polish, a clear rubber base packed with vibrant multicolor flakes in electric pink, royal blue, lemon yellow, and black. This joyful, confetti-style shade brings the ultimate party vibe to... -


Blue Blink Rubber Base Gel with Flakes
$13.97Introducing Dan’s Nails – Blue Blink Rubber Base Gel Nail Polish, a captivating translucent base in a soft blue tone infused with bold reflective flakes in navy, silver, and charcoal. This dreamy shade brings a refreshing and modern twist to... -
Sale

 Sale
SaleSilvered White Rubber Base Gel
$19.97$13.97Volume: 15ml/0.5 fl. oz Color: Silvered White Package Includes: 1 Bottle Required: UV/LED Nail Dryer Lamp and gel topcoat (NOT INCLUDED) Silvered White | Rubber Base Gel A transformative solution for thin and weak nails. FOR PROFESSIONAL...
How to Apply It
Shop Now
Maximize Results: Optimize with Our Specialized Range
Pairing our Rubber Base Collection with our exclusive range of nail-perfection products is recommended for unmatched durability and perfection. Our product line, from the initial phase of adhesion-promoting Bonder to the final glossy touch of our top coats, is intricately curated to work in unison, delivering a seamless, long-lasting manicure.


Best Rubber Base Gel Polish
Distinguished for its exceptional properties, Dan’s Rubber Base Gel Polish excels in the industry. With a distinctive consistency, self-smoothing characteristics, and broad compatibility, it's the go-to choice for nail connoisseurs for several reasons:
- Effortless Self-Smoothing: The rich consistency guarantees a streak-free, uniform application, eliminating imperfections.
- Universal Compatibility: Our Bases are engineered to blend flawlessly with many UV/LED polishes, offering endless versatility.
- Uncompromised Durability: Experience a stunning, chip-resistant manicure that retains elegance for over four weeks.
- Protection for Natural Nails: Beyond aesthetics, this base coat fortifies your natural nails, shielding them from issues like discoloration or weakening.
To fully harness its benefits, it's critical to use a 48 Watts Dual UV/LED Nail Lamp emitting at a wavelength of 365nm+405nm, ensuring an optimal and safe curing process.
How To Apply

Step-by-Step Tutorial
- Preparing the Nails: Begin with cuticle care, gently pushing them back to reveal more of the nail surface, ensuring an even application space. Trimming excess cuticles is vital, as neglecting this can cause the gel to peel from the edges. Handle this step with caution to prevent harm.
- Priming the Surface: Use a fine-grit file (180 or 200-grit) to lightly rub the nail surface lightly, enhancing adhesion. After buffing, eliminate all traces of dust and debris using a brush, followed by a thorough wipe-down with a nail cleanser. Post-cleansing, avoiding direct contact with your nails is imperative to keep them pristine.
- Initiating Adhesion: Apply a sparing layer of primer bonder across the nail surface, forming an adhesive foundation that solidifies the gel’s attachment, which is particularly critical for nails with adhesion challenges.
- Applying Rubber Base: With a fine brush, gently lay a balanced rubber base coat onto the nail. Prioritize maintaining lean, uniform coatings to circumvent heat surges during curing and potential detachment. For an aesthetically pleasing apex or curvature, administer a secondary coat, concentrating on the nail's midpoint. Seal the perimeters meticulously to ward off premature edge lifting. Employ the ‘Flip Finger’ technique pre-curing to allow the gel to level itself naturally.
- Curing Process: Position the nails under an LED lamp for a 60-second. Utilizing a top-tier 48 Watts Dual UV/LED Nail Lamp, emitting 365nm+405nm, is paramount for an even, thorough cure. Under-cured applications may compromise durability and hypoallergenic properties.
- Concluding with Top Coat: Apply a layer of your preferred glossy top coat, encapsulating your artwork and adding a lustrous finish. Pay attention to sealing the nail’s tip and complete a 60-second cure.
Pro Tips and Best Practices:
-
Controlled Application: A thick rubber base application may induce a heat spike during curing. Adopting a gradual approach is advisable, starting with thinner layers and adding more as required.
- Inhibition Layer Note: After curing, a sticky residue, known as the inhibition layer, is normal and beneficial for subsequent layering. After the final top coat application and cure, it will be integrated and vanish.
- Handling Short Nails: For extremely short nails, it’s advisable to wait for at least 1mm of growth beyond the nail bed before application to ensure a secure gel sealing, minimizing early peeling incidents.
- Maintenance for Longevity: The rubber base’s resilience is influenced by external conditions like manual labor, frequent water contact, or chemical exposure. Periodic inspections and prompt touch-ups can prolong your manicure’s lifespan.
How to remove it?
File the top coat gently with a 100 Grit Nail File or you can use a drill with a medium ceramic drill.
Use a UV/LED polish nail remover or soak a cotton ball with acetone, place it on each nail and wrap each nail in foil for 10-15 minutes to allow the cotton ball with acetone to soften the rubber base.
Use a cuticle stick or cuticle pusher to gently remove the softened lacquer from the cuticle area toward the tip of the nail. If you notice that you need to soften a little more as you remove the soft layer, you should moisten the cotton with acetone and place it on the nail for a few minutes until it is completely removed.
Lightly buff the nails again when the varnish is completely removed.


Customer Reviews
Discover what our valued customers have to say about our products. Dive into their firsthand experiences and insights.Long lasting!
I bought the milky white shade with lovely flakes, and it's stunning! I've received numerous praises. If you aim to lengthen your nails, this is magical! My nails, typically fragile and prone to chipping, stay perfect with this polish. It's durable and flexible, so even if I accidentally bump it, there's no issue. No signs of lifting, peeling, or chipping for me.
Beautiful color!!
My first experience with Dan’s and using a rubber base was surprisingly simple. The shade was absolutely stunning! I'll certainly be shopping more from Dan’s.
Best Quality
I've experimented with various gel base brands on Amazon, seeking a polish that maintains my nail length during busy days. (Excuse my cuticles.) This brand stands out in quality, offers better longevity, and is more user-friendly. It's worth its value, even compared to less expensive options!
FAQ
What is Rubber Base Gel Polish?
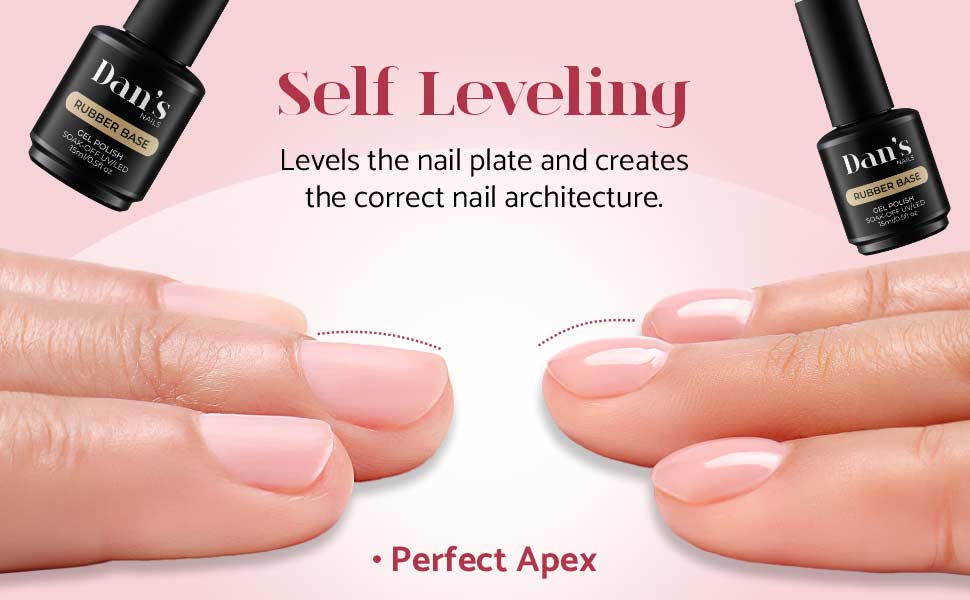
A rubber base gel is a base coat for gel polish that has an extra elastic and flexible nature. It's specifically used to strengthen weak, thin, and brittle nails that are susceptible to flaking and splitting. The secret to its flexibility? These base gels are enriched with additional plasticizers, granting them the ability to bend effortlessly without breaking.
It is a self-leveling base coat, which makes it easy to apply and results in a perfect Apex and C-curve nail. It corrects imperfections such as ridges or cracks, creates a protective barrier of defense for your nails, and allows you to create small extensions in addition to extending the life of the nail polish. It is a base coat especially indicated for greasy nails, as it creates a protective barrier on your nail, preventing the grease of your nail from expelling the polish and shortening its life. Rubber base gel coat is suitable for both natural nails and extensions.
What is the Difference Between Rubber Base and Normal Gel Base Coat?
The primary distinction between a normal base coat and a rubber base gel coat is the thickness and the consistency; rubber base coats are significantly thicker than normal base coats because you can see that it's taking some time for it to dry on the brush.
Rubber Base vs Gel Builder
Are you confused about the difference between rubber base and builder gel? Both types of nail gels may seem similar, but they serve different purposes. In this article, we will help you understand the differences between these two types of nail paints, their features, how they are used, and the different types of builder gels available. Read on to learn more about rubber base vs. builder gel and choose the one that best suits your nail care needs.
How Long does Rubber Base Gel Last?
Between 3 and 4 weeks. Although a manicure created with rubber gel can last up to four weeks, this usually depends on the brand used, the preparation of the natural nail before applying the rubber base and how well it is applied, as well as how well the previous coat is removed, if there was one. When applied on natural nails, a good bond primer is required even on all UV/LED polishes, we recommend that you use our bond primer for better adhesion and health of your nails as it is acid-free.
I experienced a heat sensation during curing. Is this expected?
While infrequent, a warm feeling can occur during the curing, especially if the UV/LED polish is excessively thick. It’s imperative to keep the layers slim and evenly spread and utilize a 48 Watts Dual UV/LED Nail Lamp at the specific 365nm+405nm wavelength for safe, adequate curing. Should discomfort continue, cease application and seek professional guidance.
The gel appears lumpy or isn’t curing correctly. What’s the issue?
For a sleek finish, gel should be applied in delicate layers. Overly thick layers can hinder proper curing and lead to an uneven surface. Moreover, ensure your 48 Watts Dual UV/LED Nail Lamp functions correctly and at the ideal wavelength (365nm+405nm). A lamp nearing the end of its lifespan may require bulb replacement. (Note: A sticky surface post-curing, known as the inhibition layer, is standard and crucial for adhesion).
My gel polish peeled off too soon. What could be the cause?
Several factors could contribute to early peeling. Nail preparation must be thorough, ensuring they are clean, devoid of oils, and lightly buffed. The lacquer should encapsulate the entire nail edge to avoid lifting. Mastery in application and curing techniques is essential for durable wear. It’s wise to consult or seek training from a seasoned professional if uncertain.
Why does the color differ from what was shown?
Is there a risk of allergic reactions?
Can I expedite the removal process?
While we pride ourselves on the durability of our products, we understand the need for change. We recommend soaking the nails in acetone after lightly filing the gloss layer. The use of a professional-grade enamel remover can further ease the process. Forcing or peeling off the UV/LED polish can severely damage your natural nails.
Can I Use it for Russian Manicure?
"Russian manicure" refers to a technique where the cuticle is meticulously cleaned, and the nail plate is prepared using an e-file (electric file) or a regular nail file. The goal is to achieve an elegant and clean nail surface before application. When it comes to the type of gel used after the preparation, it varies based on preference and the desired result:
- Rubber Base: Often used for its flexibility and adhesive properties.
- Builder Gel: Provides strength and is used to sculpt or build the nail.
- Gel Polish: Offers color and finish in a gel form.
Dan's Nails offers an array of premium enamel products designed to complement the Russian manicure preparation. While the specific product may vary based on client needs, each reflects our brand's commitment to quality and excellence—Trust Dan's Nails for superior Long-wear polish solutions crafted with professionals and enthusiasts in mind.
Dan’s Nails encourages contacting our customer support team for any additional inquiries or detailed guidance. Our professionals are readily available to assist you in achieving your perfect manicure!
Benefits
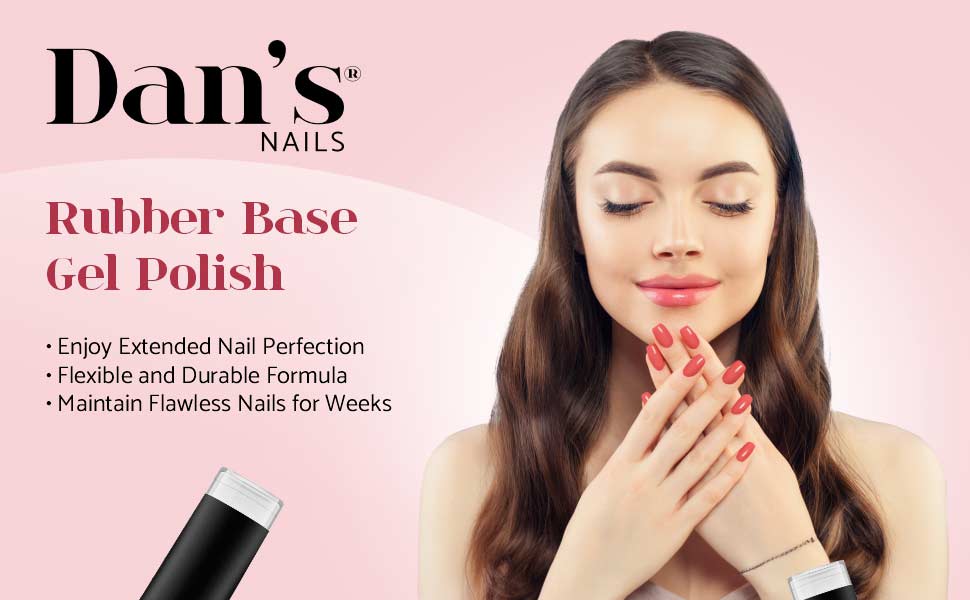
The main benefit of rubber base gel coat is that it strengthens weak nails, adds shine and flexibility, and offers better adhesion to the polish, which guarantees a longer-lasting manicure.
With this gel the nails will be able to grow without breaking and will even look impeccable and stronger if you decide to remove the product completely.
